I Thực Hiện Cài Đặt IIS, PHP Và MariaDB
1. Cài Đặt Webserver IIS trên windows.
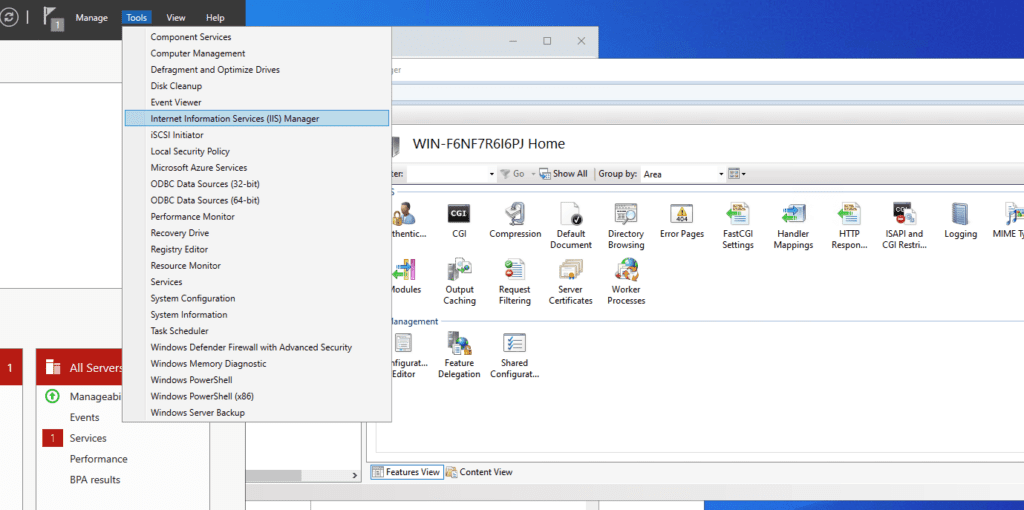
Bạn chọn Server Manager bằng nhiều cách ở hình
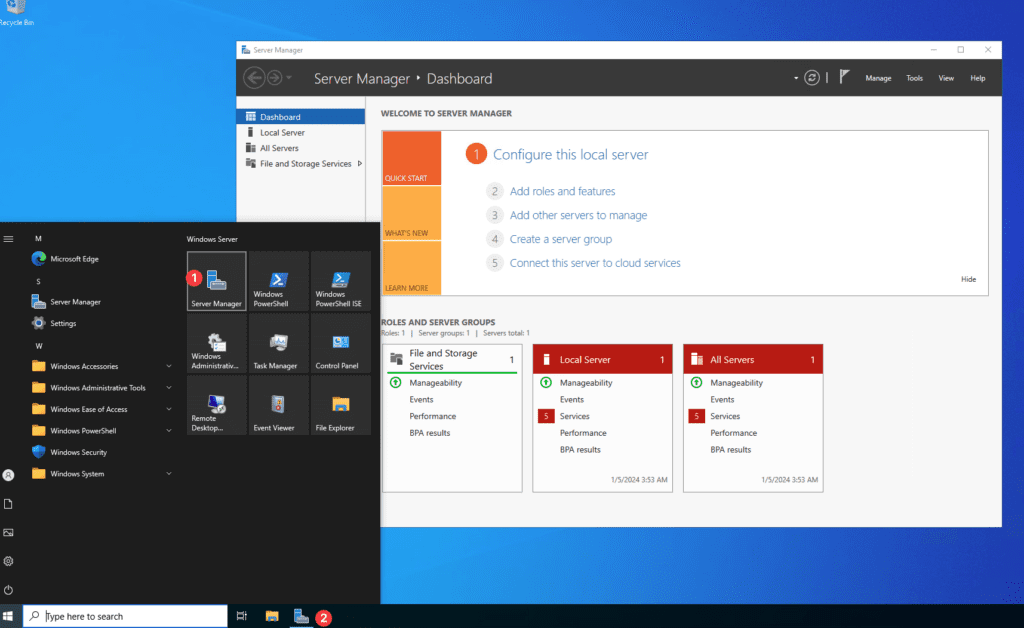
Sau đó chọn Add Roles and Features
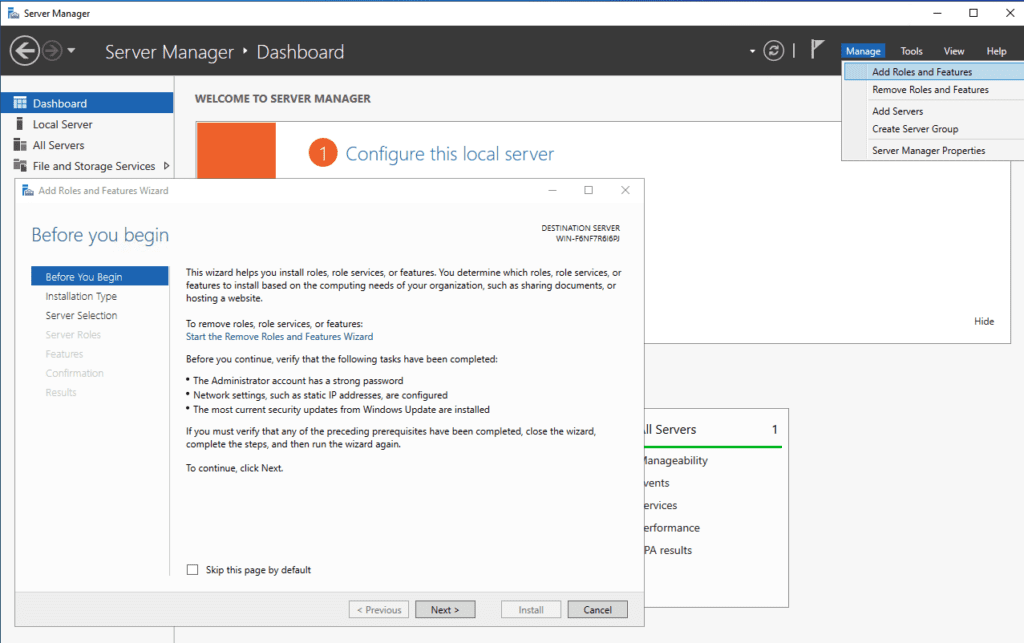
Tiếp theo bạn chọn Next khi được hỏi.
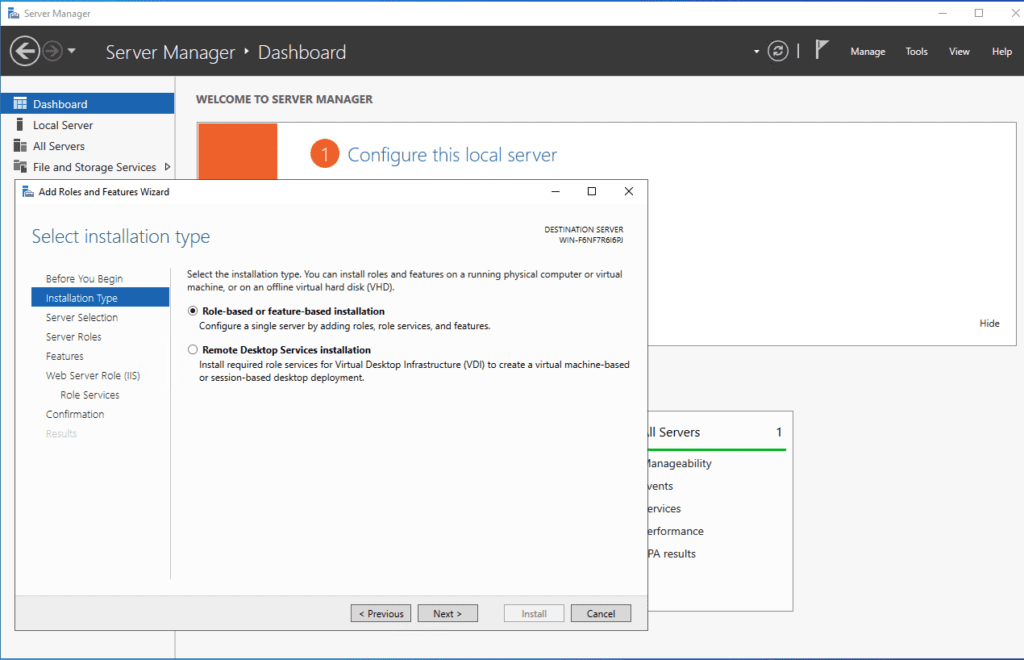
Tiếp tục chọn Next
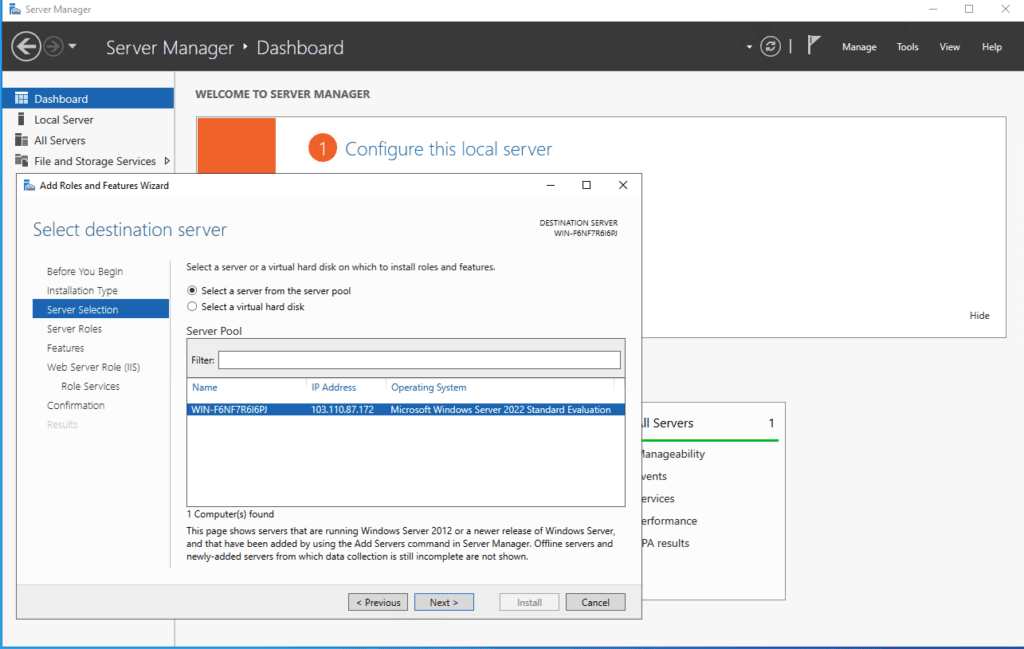
Tiếp tục chọn Next
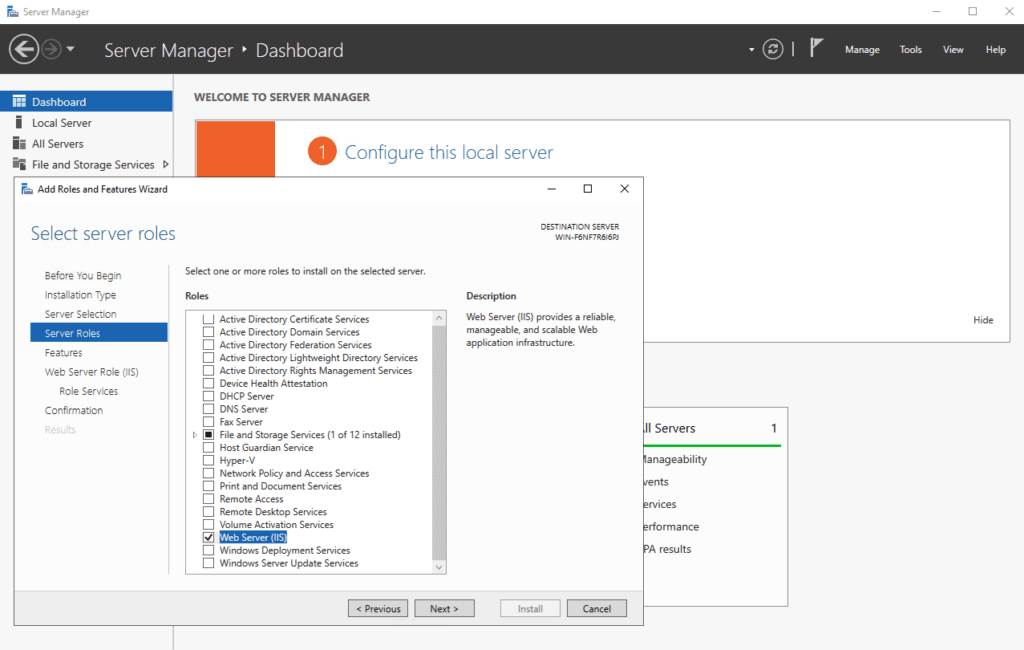
Chọn Web Server (IIS) => Chọn Next
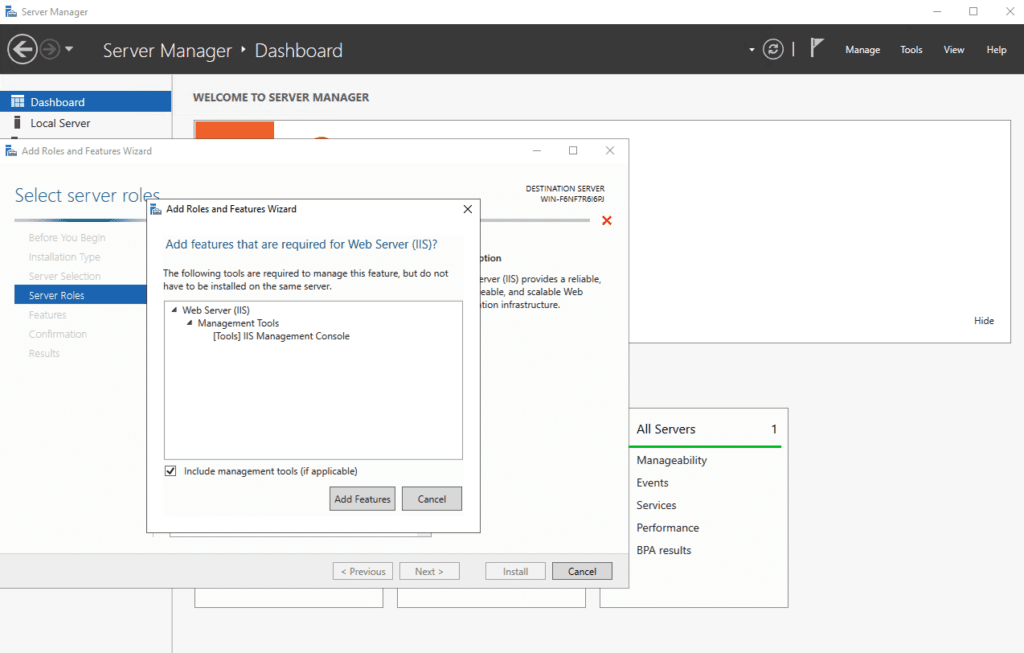
Chọn Add Features => Chọn Next
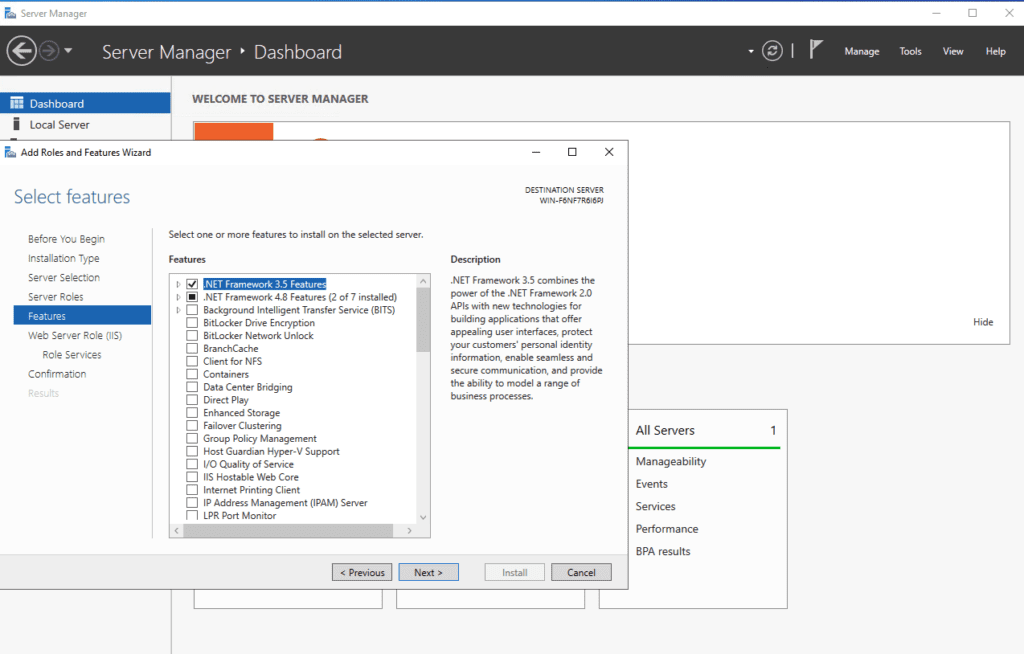
Chọn .NET Framework 3.5 Features => Chọn Next
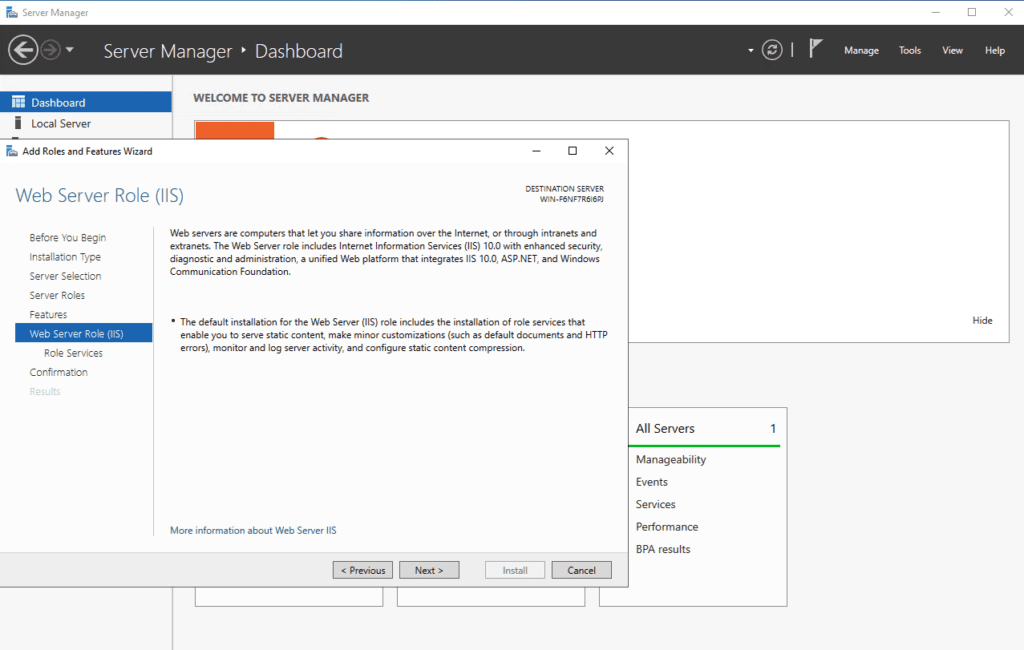
Tiếp tục chọn Next
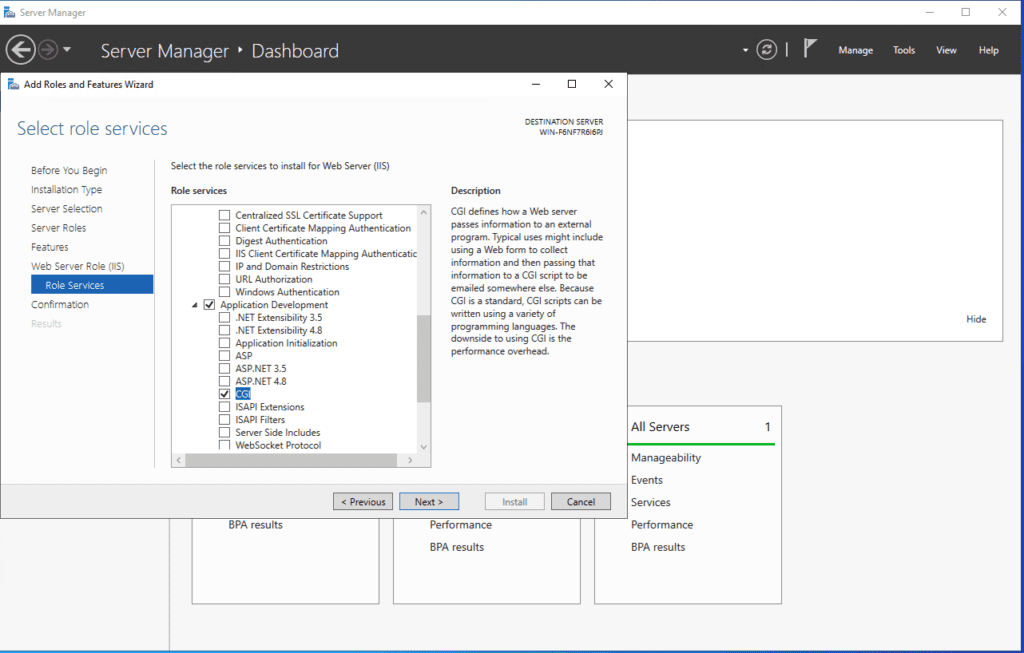
Chọn Application Development ==> chọn CGI ==> Chọn Next
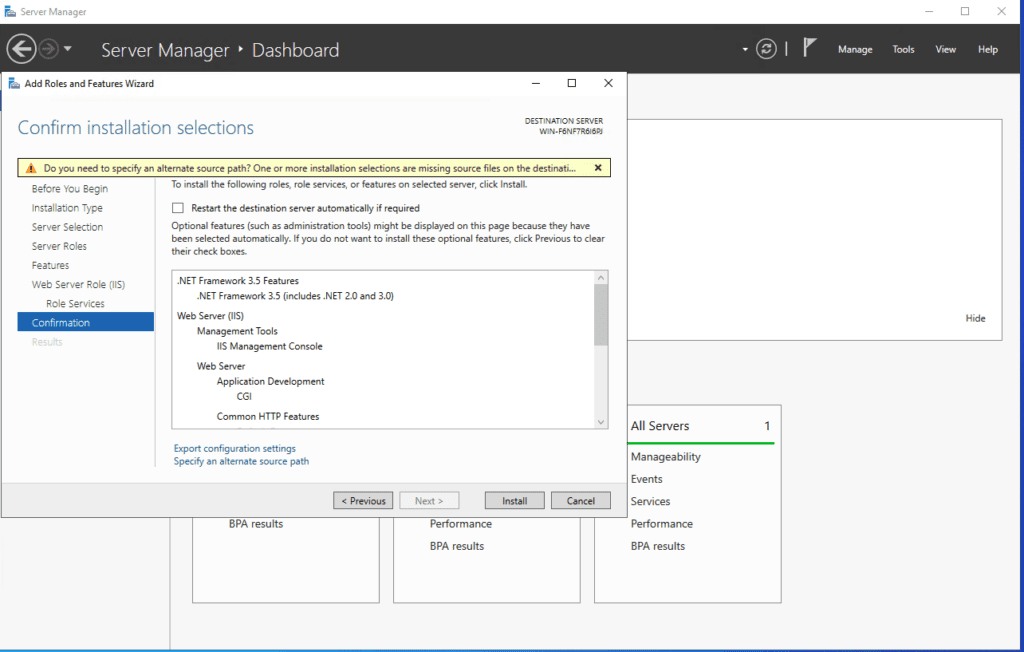
Chọn Install để cài đặt
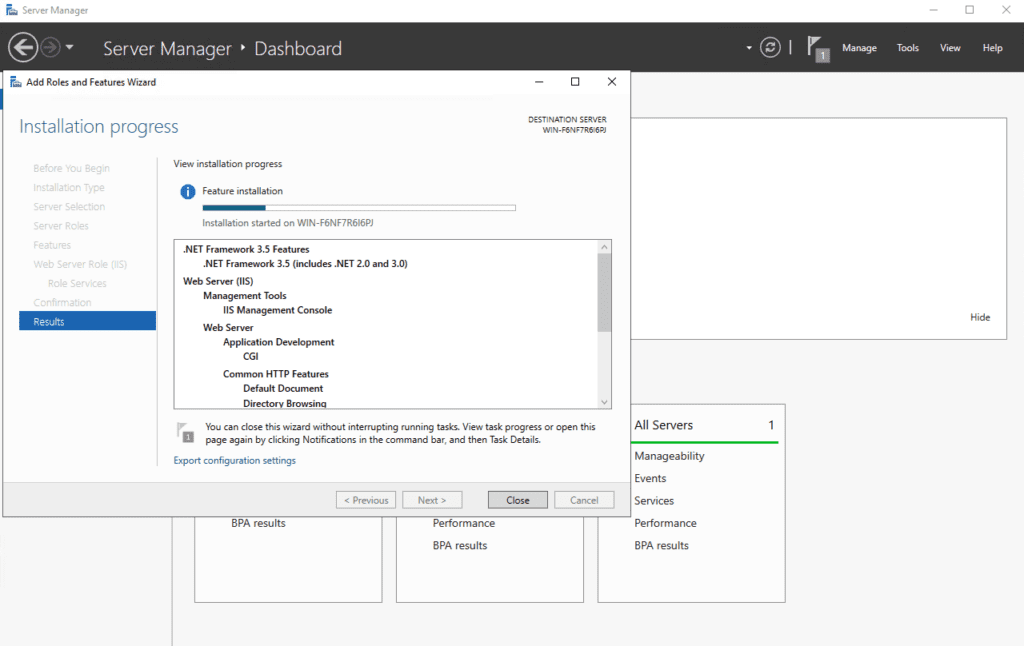
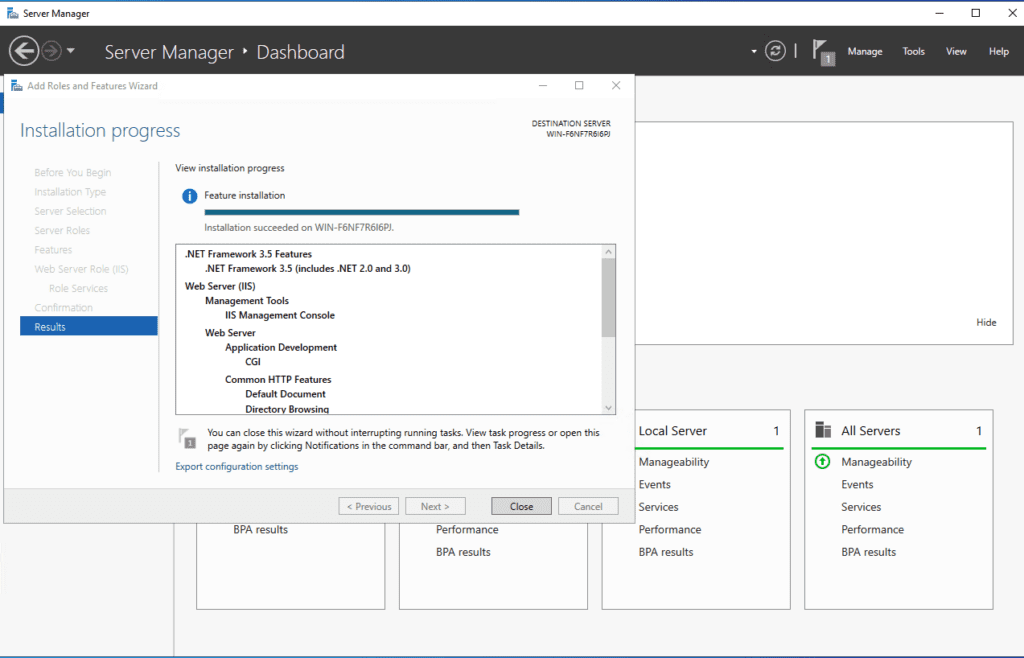
Tại đây bạn chờ ít phút để tiến trình cài đặt webserver IIS
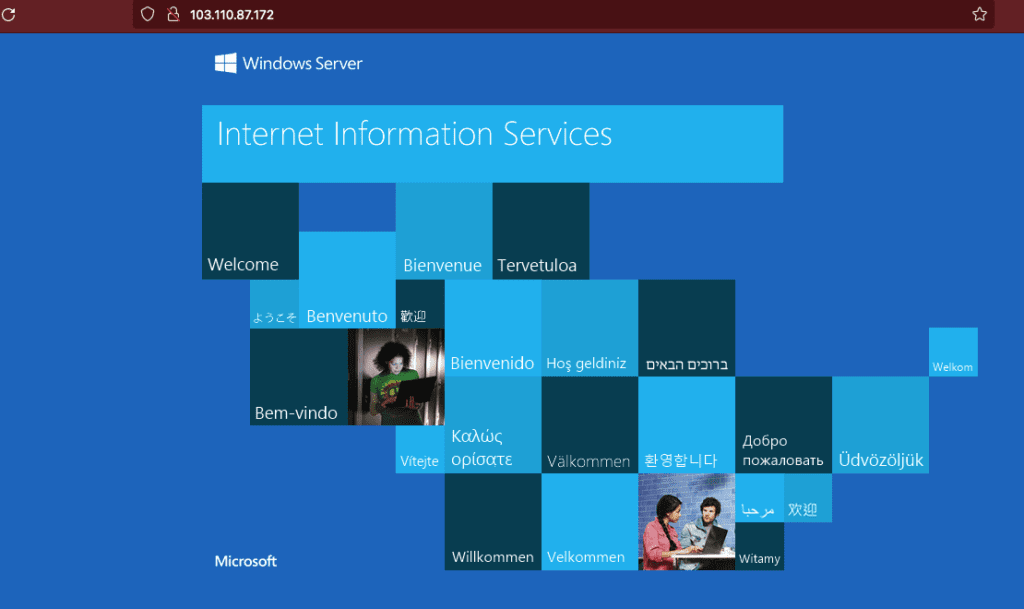
Sau đó bạn truy cập vào IP, nếu xuất hiện như ảnh bên dưới với dòng thông báo Internet Information Services là bạn đã cài thành công.
2. Cài Đặt PHP Để WordPress Hoạt Động.
Bạn cần truy cập link ở đây để tải các phiên bản php muốn sử dụng. Và trong bài viết này sử dụng phiên bản PHP 8.0
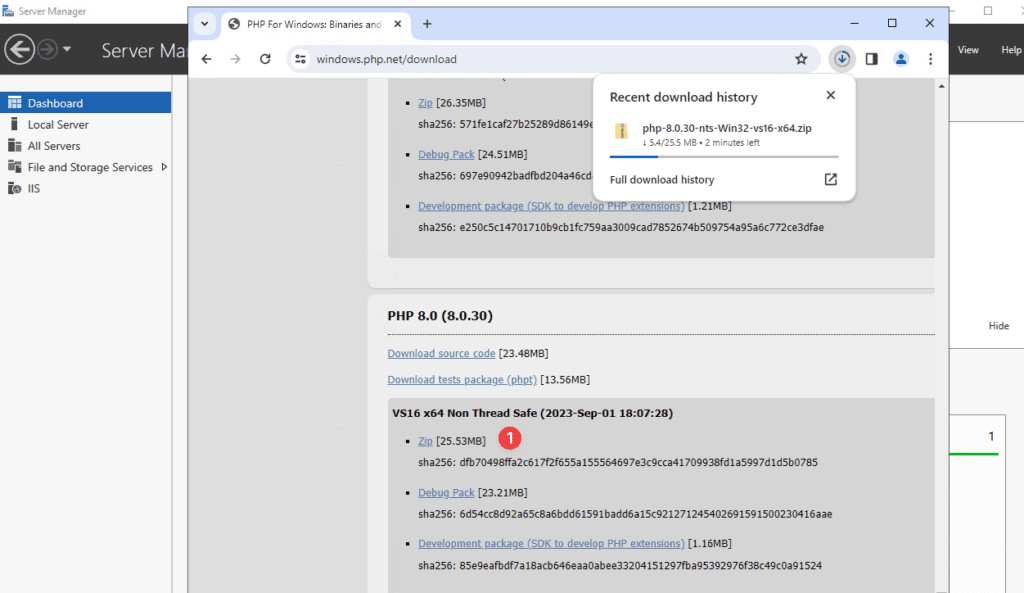
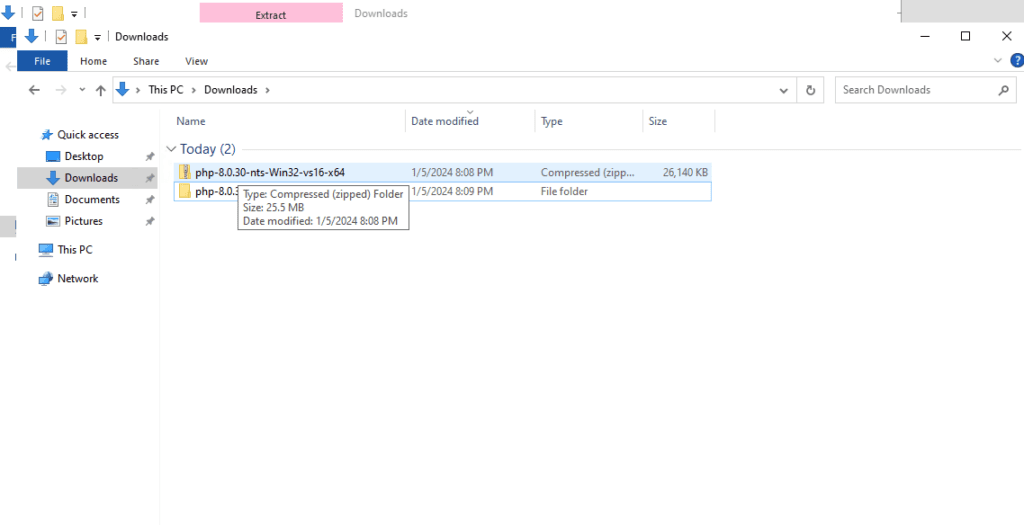
Download file zip về. Bạn hãy giải nén và đổi tên php-8.0.30-nts-Win32-vs16-x64 thành php-8.0.30 cho dễ nhớ.
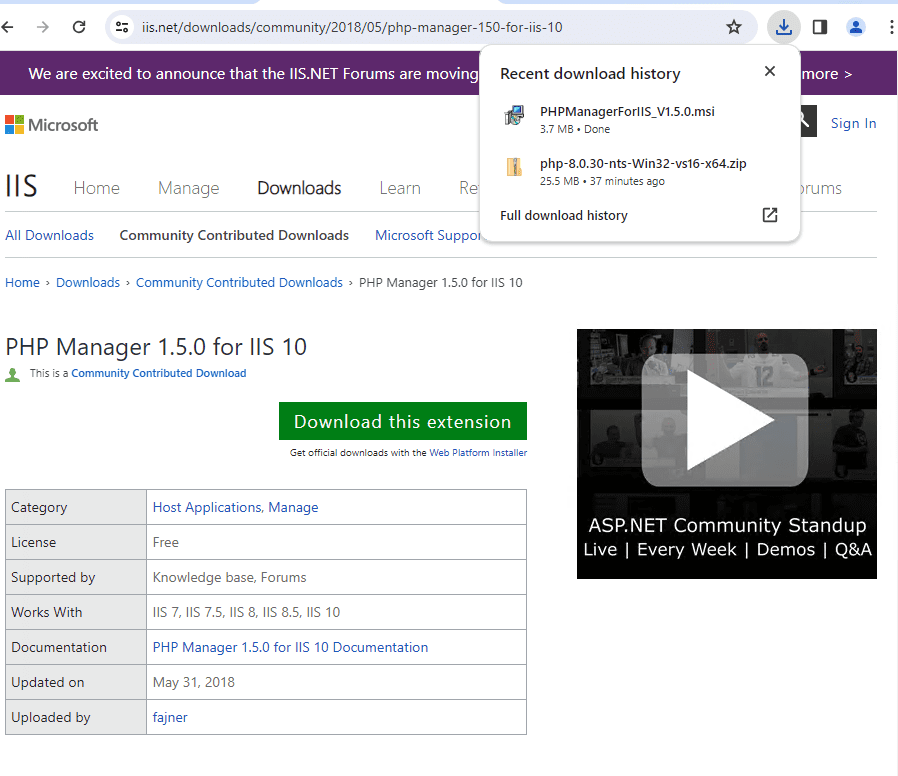
Tiếp theo tuy cập link bên dưới để cài đặt Phần quản lý PHP cho IIS
https://www.iis.net/downloads/community/2018/05/php-manager-150-for-iis-10
https://github.com/phpmanager/phpmanager/releases
Tiến hành cài đặt php-manager-150

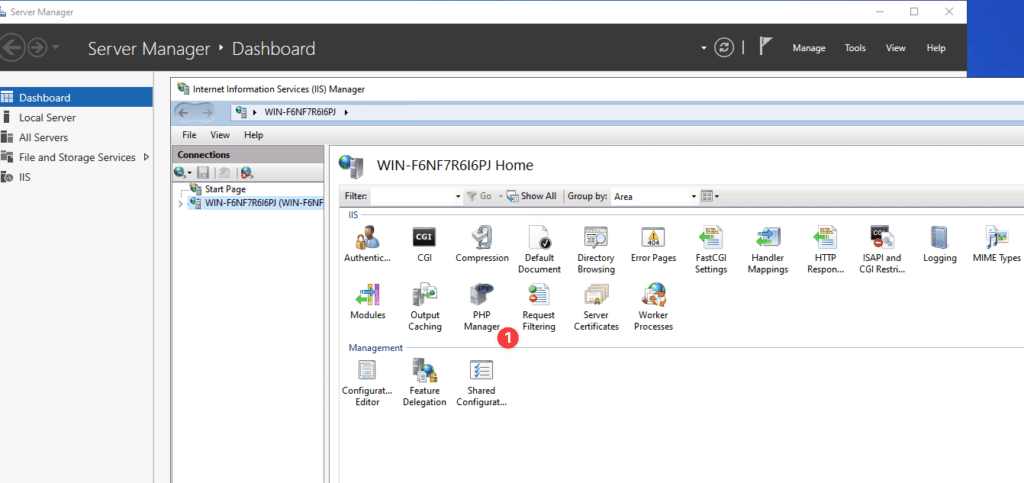
Sau khi cài đặt thành tắt hết mở lại phần quản lý IIS sẽ có thêm PHP Manager
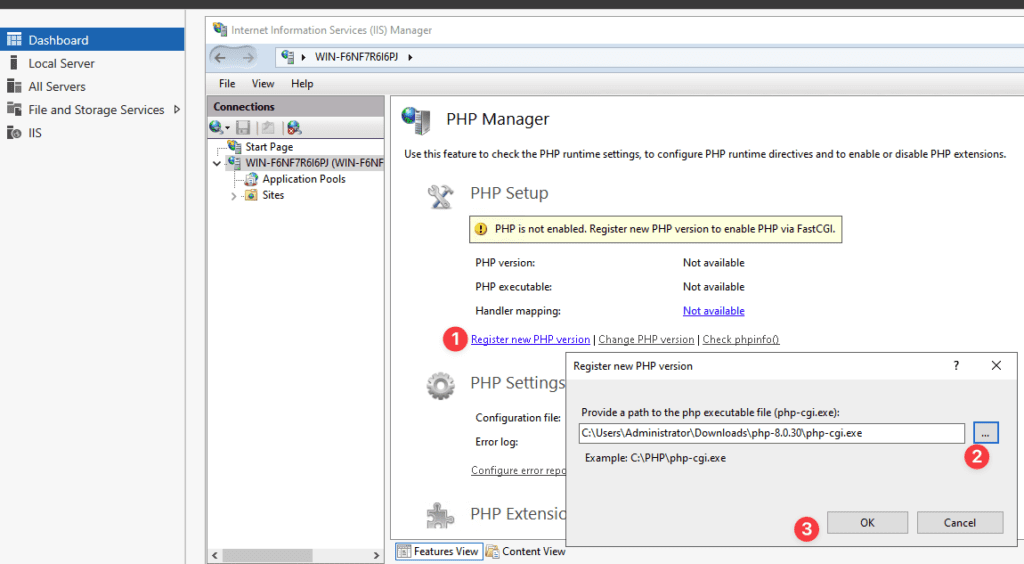
Chọn PHP Manager => Register new PHP version => thư mục đang lưu php-8.0.30 đã giải nén => OK
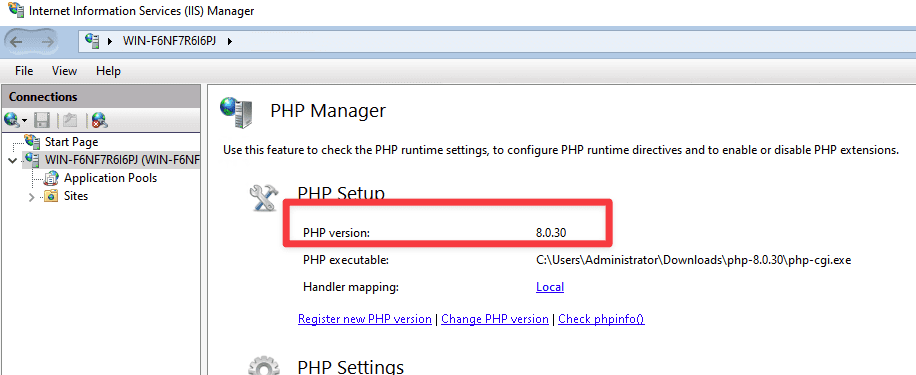
Thông tin PHP version 8.0.30 là đã thành công.
Nếu thấy có cảnh báo màu vàng hoặc web chỉ vào được html, không vào được file php (phpinfo.php) thì cmd chạy php để xem báo lỗi
Lỗi php như sau:
How to fix 500 Internal Server Error for PHP 7.4 with IIS on Windows Server?


Chạy cmd : php -m
PHP Warning: ‘vcruntime140.dll’ 14.0 is not compatible with this PHP build linked with 14.16 in Unknown on line 0
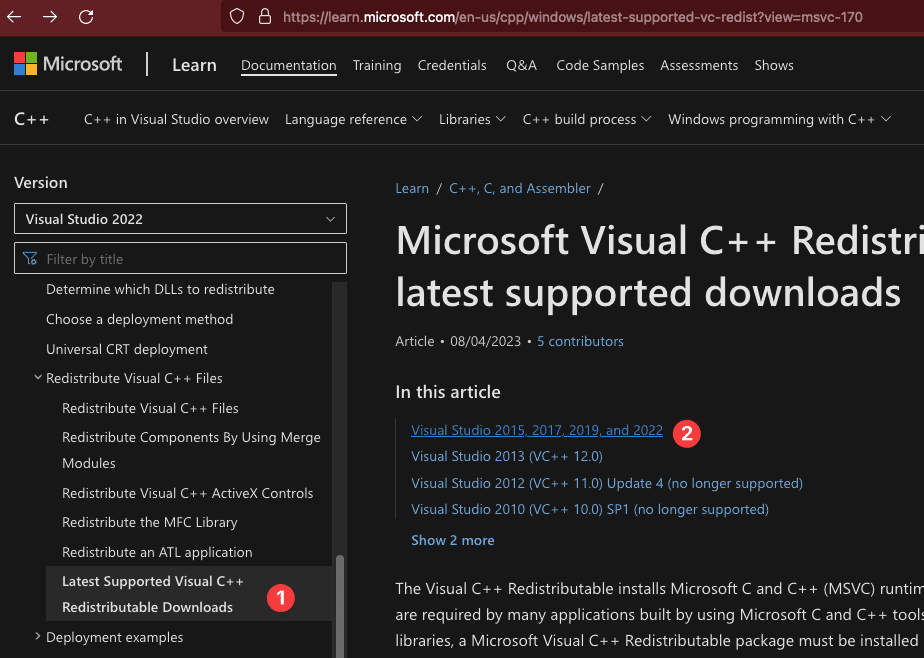
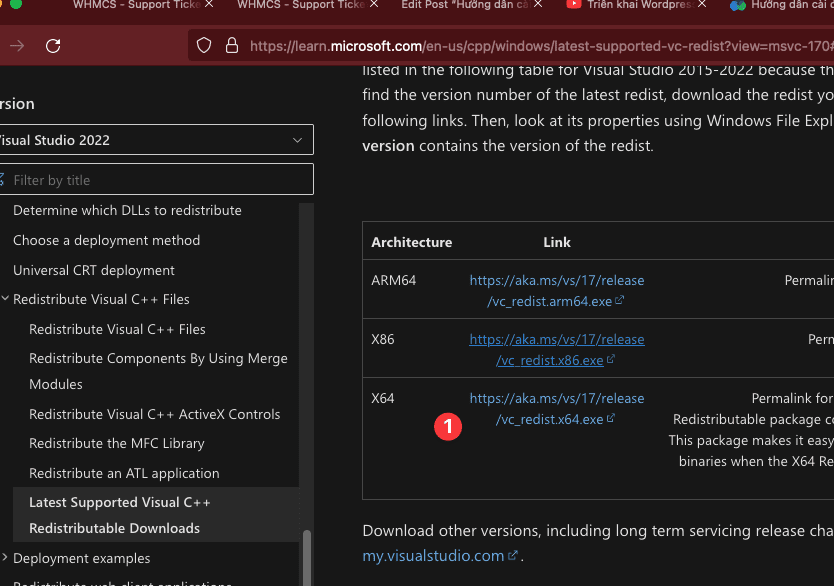
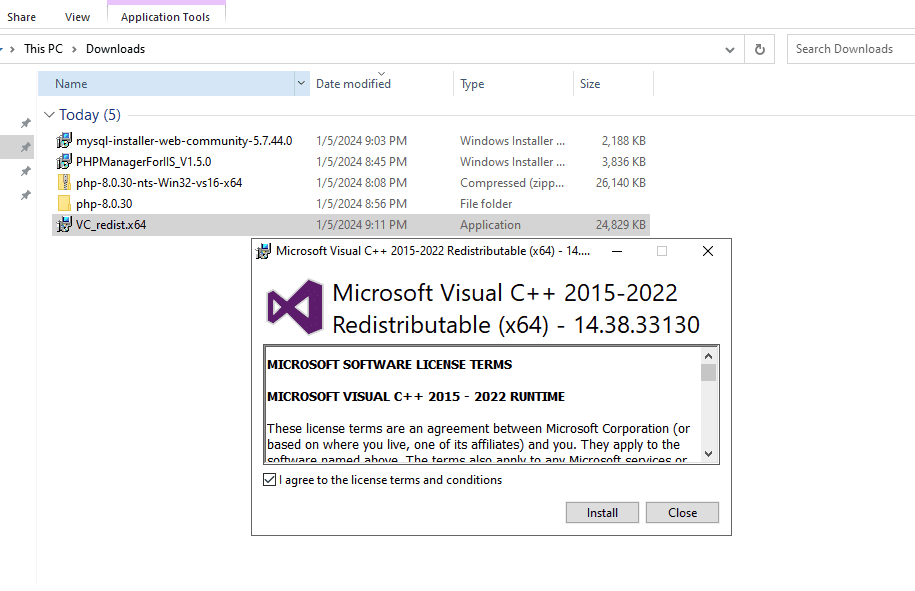
As per the warning we need to upgrade the Visual C++ runtime to the latest version. Here, we will upgrade it to Visual ++ 2015-2019. You need to install it as per your system require whether it is x64 or x86.
Theo cảnh báo, chúng tôi cần nâng cấp thời gian chạy Visual C++ lên phiên bản mới nhất. Tại đây, chúng tôi sẽ nâng cấp nó lên Visual ++ 2015- 2019. Bạn cần cài đặt nó theo yêu cầu của hệ thống là x64 hay x86.
Tải xuống Visual Studio C++ > Redist.64.exe
Tải xuống Visual Studio C++ > Redist.86.exe
Bạn có thể cài đặt cả hai nếu bạn gặp phải vấn đề bằng cách cài đặt bất kỳ ai. 500 Lỗi nội bộ sẽ không xảy ra nữa.
3. Cài Đặt MariaDB hoặc Mysql
cài đặt MariaDB tại đây: https://mariadb.org
cài đặt MySQL
- Link download: https://dev.mysql.com/downloads/windows/installer/5.7.html
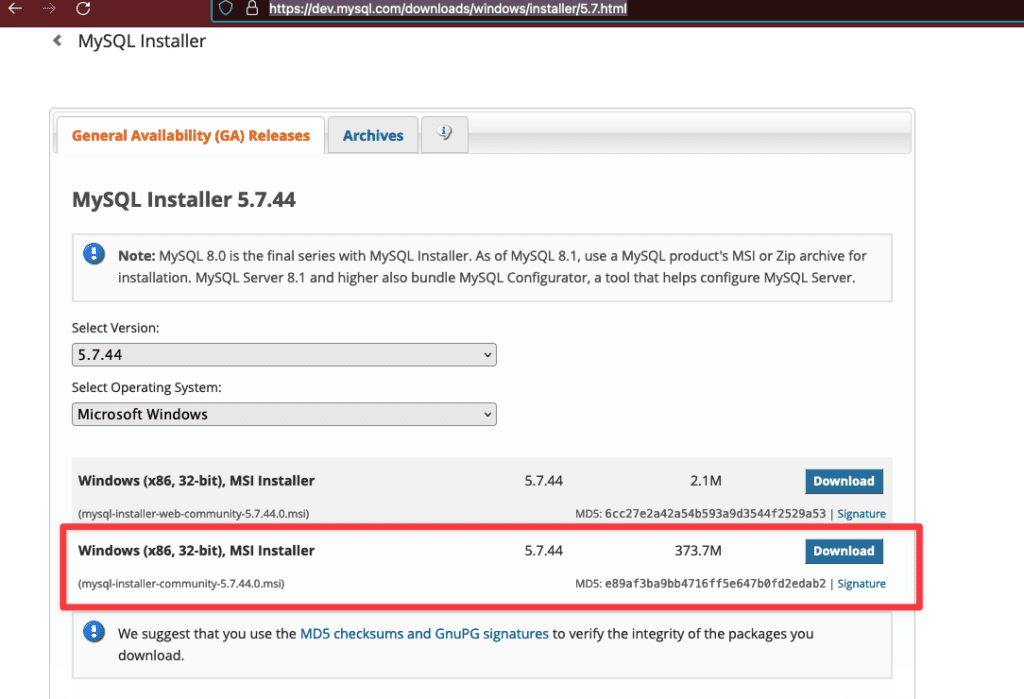
Tiến hành cài đặt MySQL 5.7
Chọn Server only
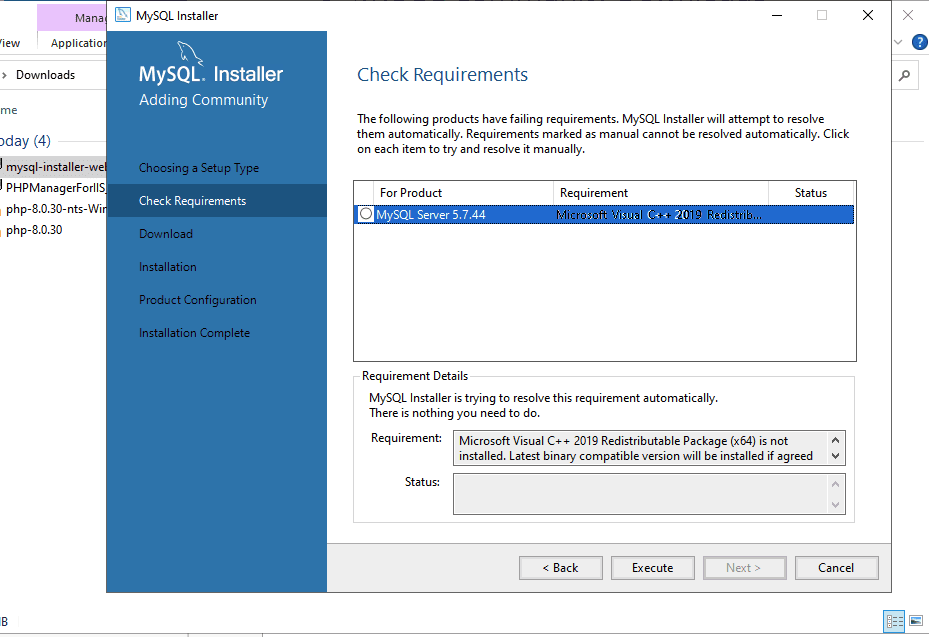
Ở bước cài đặt này yêu cài gói Microsoft Visual C++ 2019 Redistributable Package (x64) is not installed. Latest binary compatible version will be installed if agreed. Bạn truy cập vào link ở đây để chọn đúng theo gói cài đặt nhé.
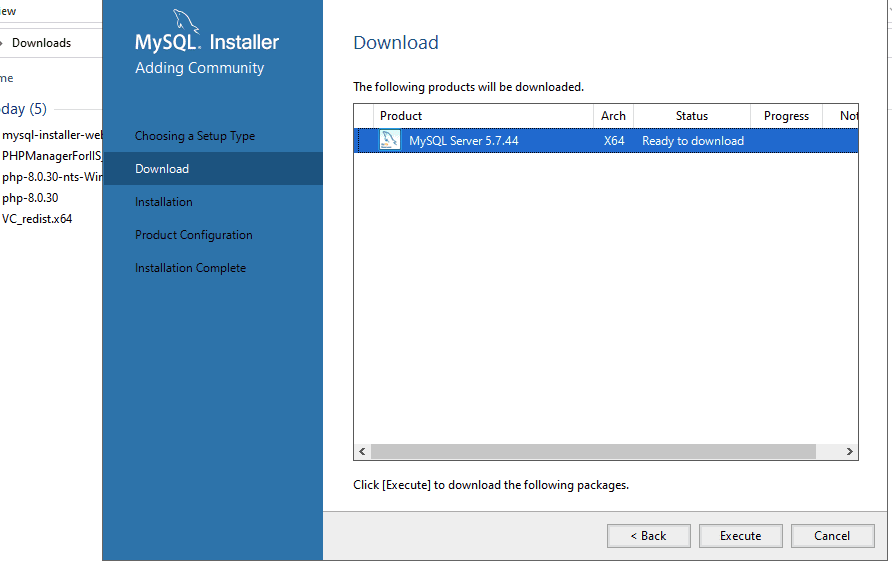
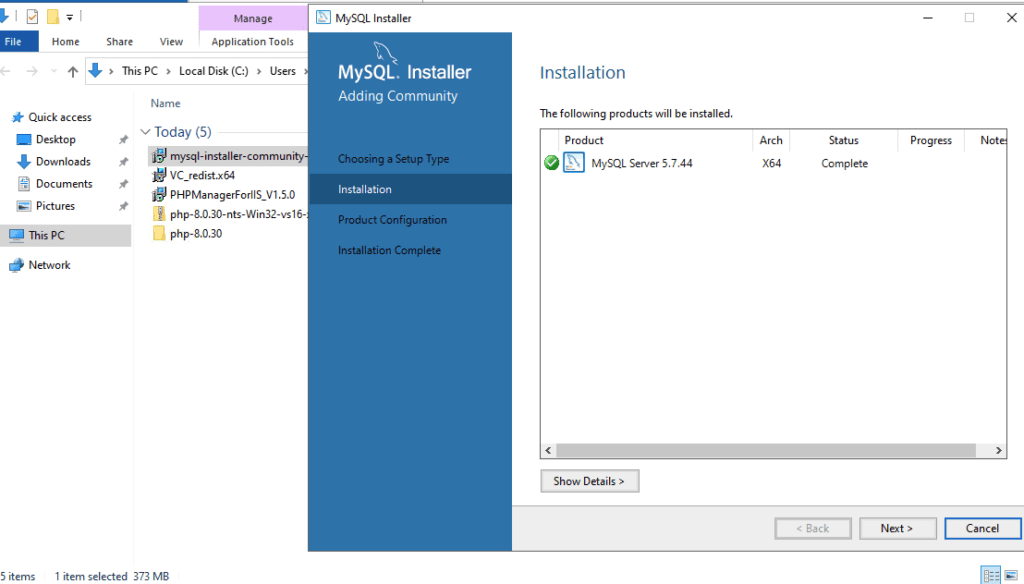
Sau khi đã cài đặt được Visual C++ 2019 chọn Execute để cài đặt MySQL
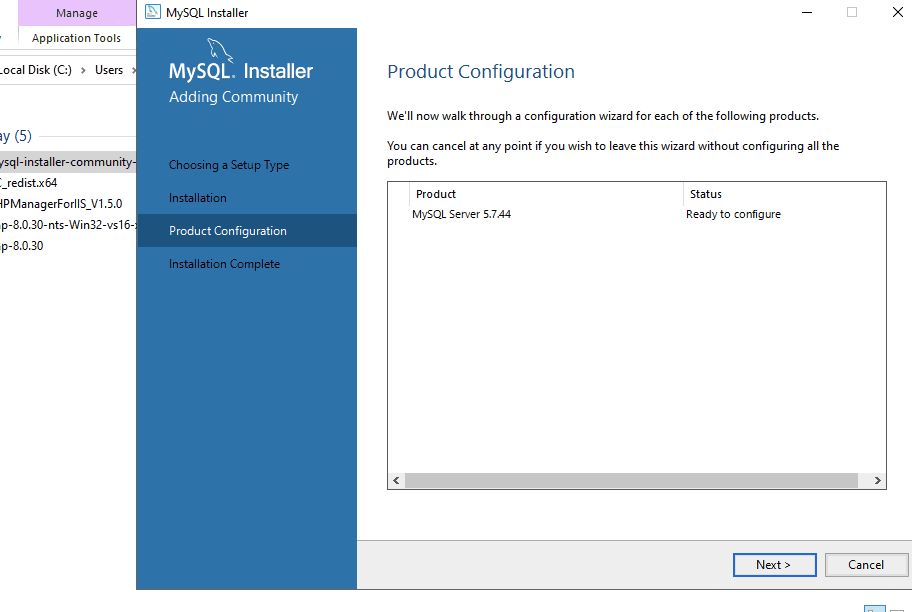
Thực hiện Chọn Next để tiếp tục cài đặt
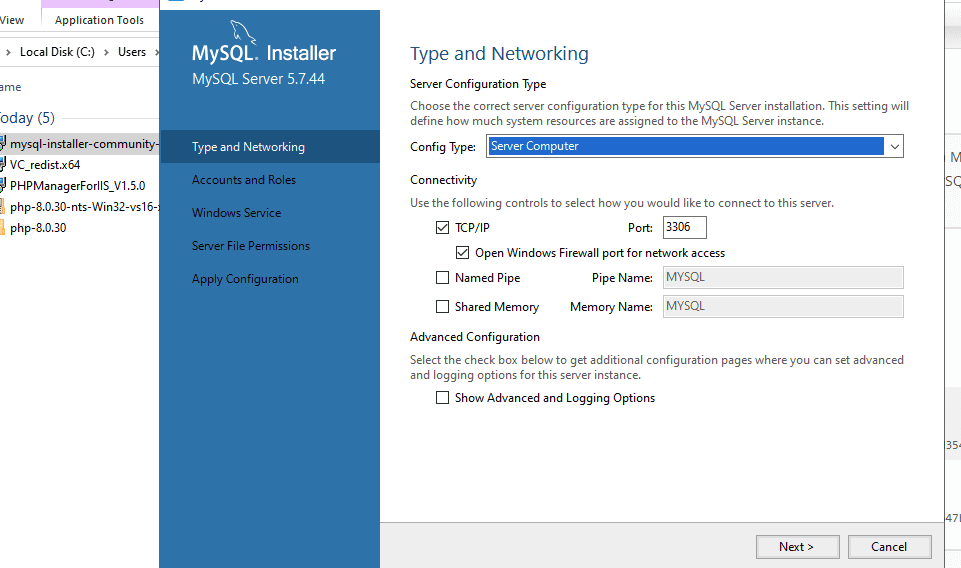
Chọn Server Computer các tuỳ chọn khác để mặc định => Next .
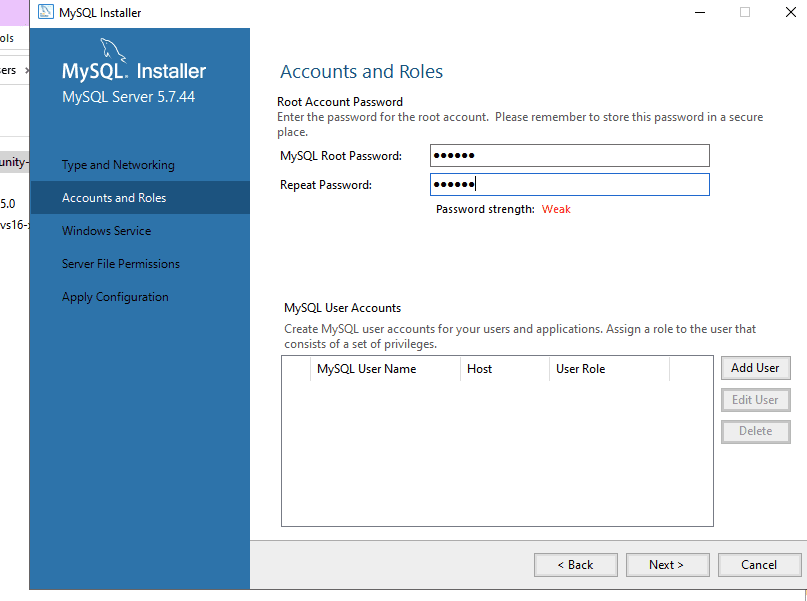
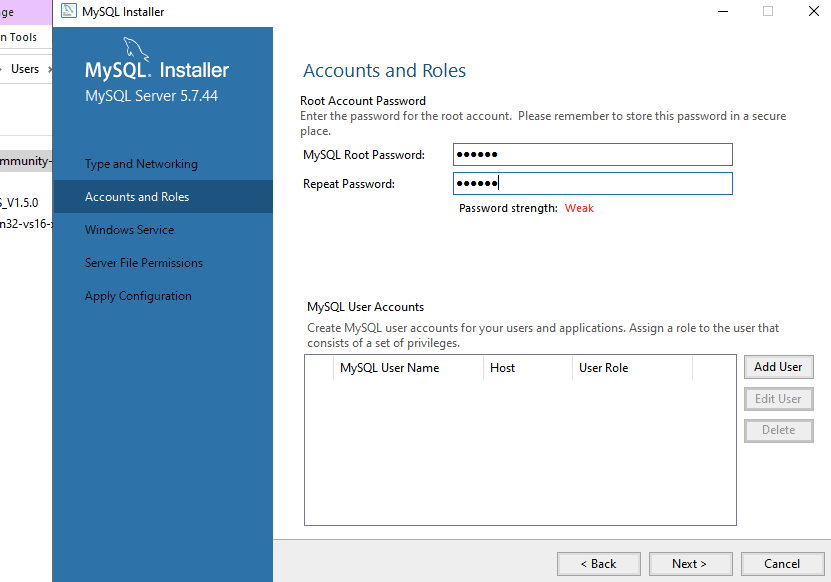
Đặt passwd root cho mysql, lưu lý passwd này bạn cần nhớ để sử dụng cho những lần sau.
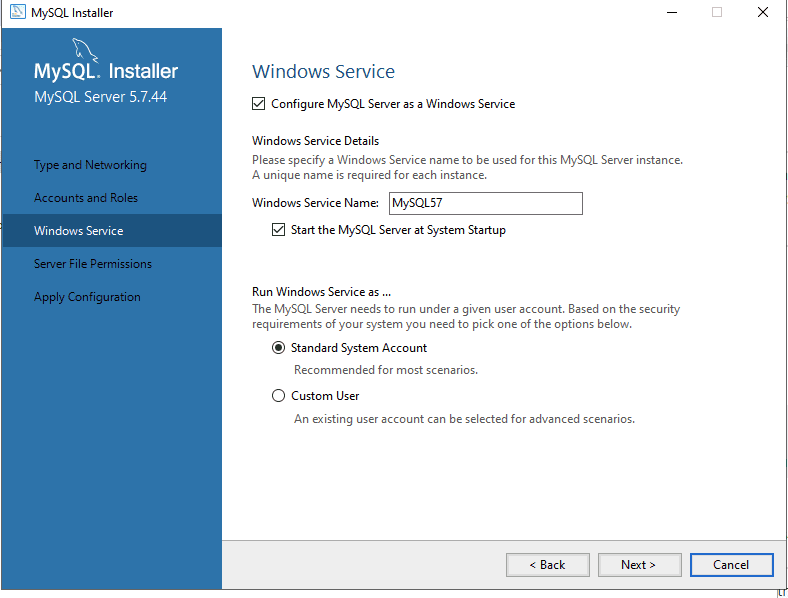
Thực hiện Chọn Next để tiếp tục cài đặt
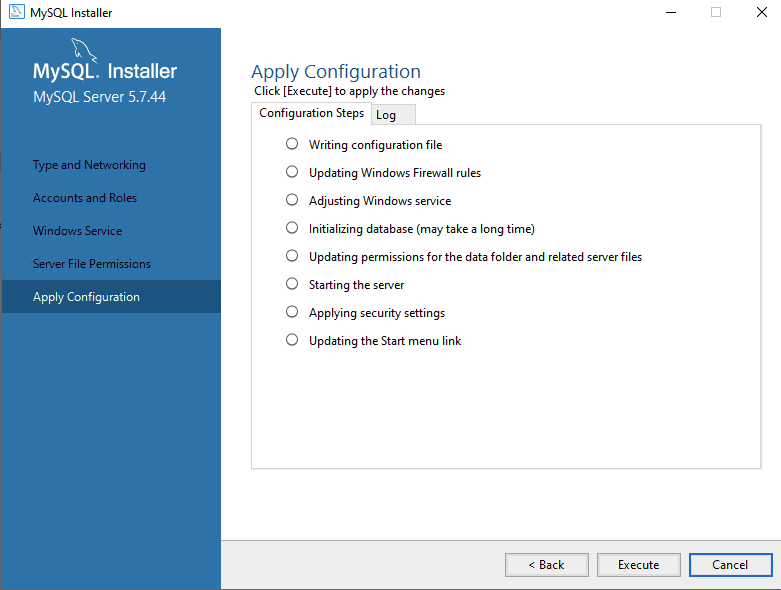
Chọn Execute để check lại phần cấu hình
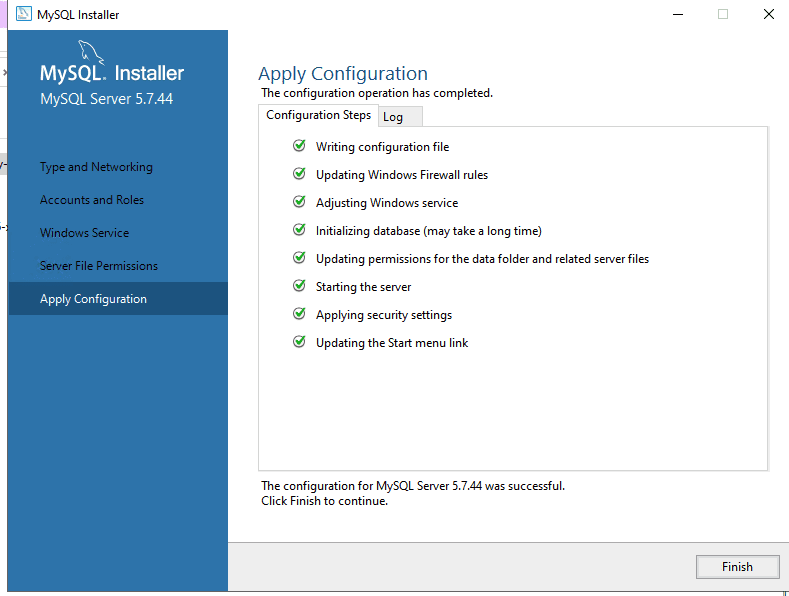
Chọn Finish là hoàn tất.
II. Tiến Hành Tạo Database Và Tạo Website WordPress.
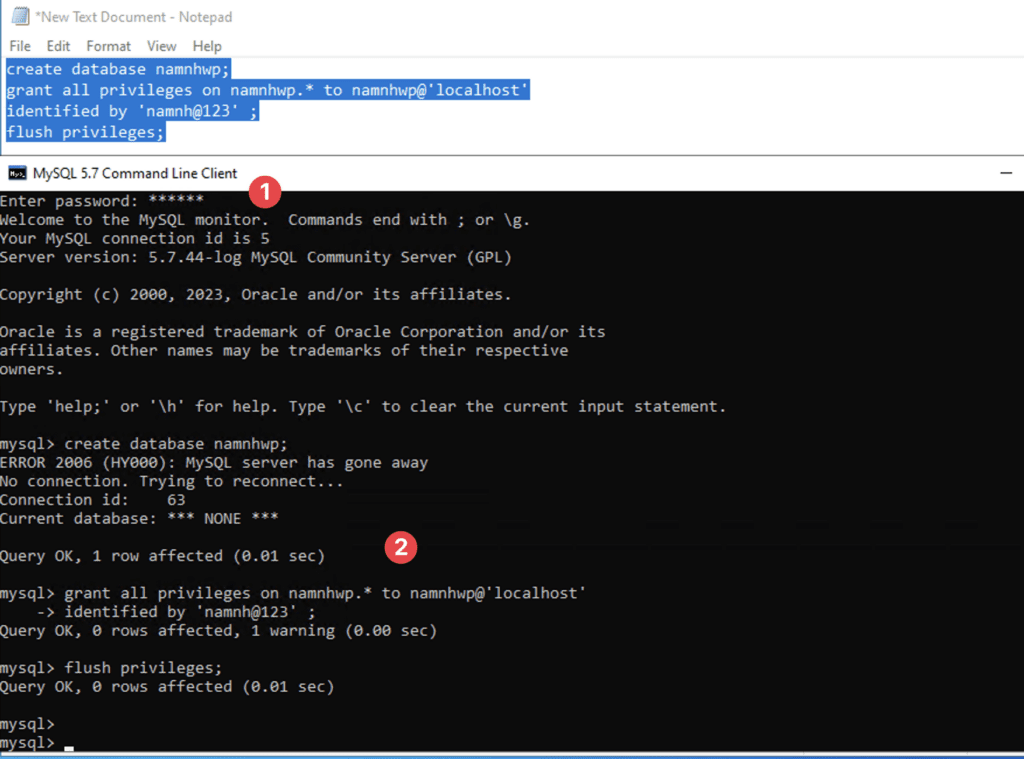
1. Tiến hành tạo database bằng lệnh
Bạn mở MySQL 5.7 Command Line Client và chạy các lệnh sau. Và hãy thay namnhwp bằng tên DB của bạn, namnh@123 bằng mật khẩu của bạn.
create database namnhwp;
grant all privileges on namnhwp.* to namnhwp@'localhost'
identified by 'namnh@123' ;
flush privileges;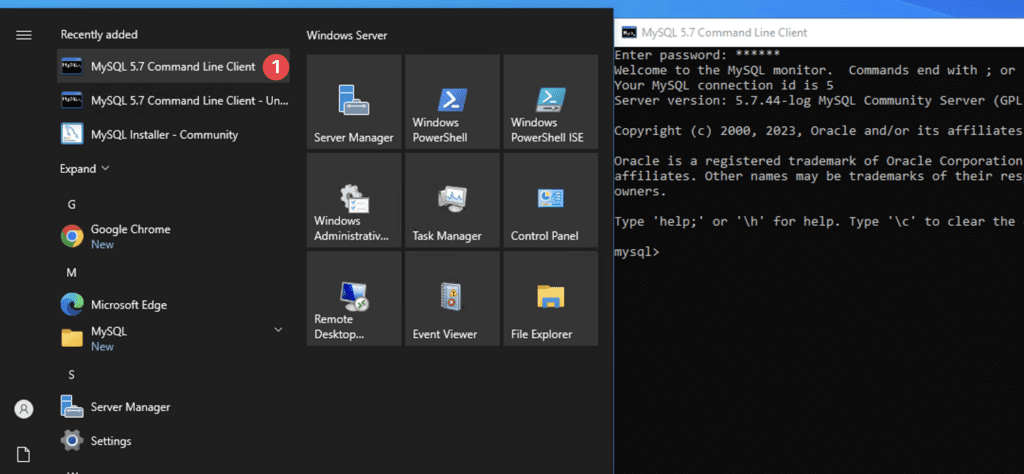
Ở hình (1) cần nhập passwd root và (2) nhập câu lệnh tạo database và gán quyền.
2. Tạo Website Và Tải mã Nguồn WordPress
Đầu tiên bạn hãy mở Internet Information Services (IlS) Manager
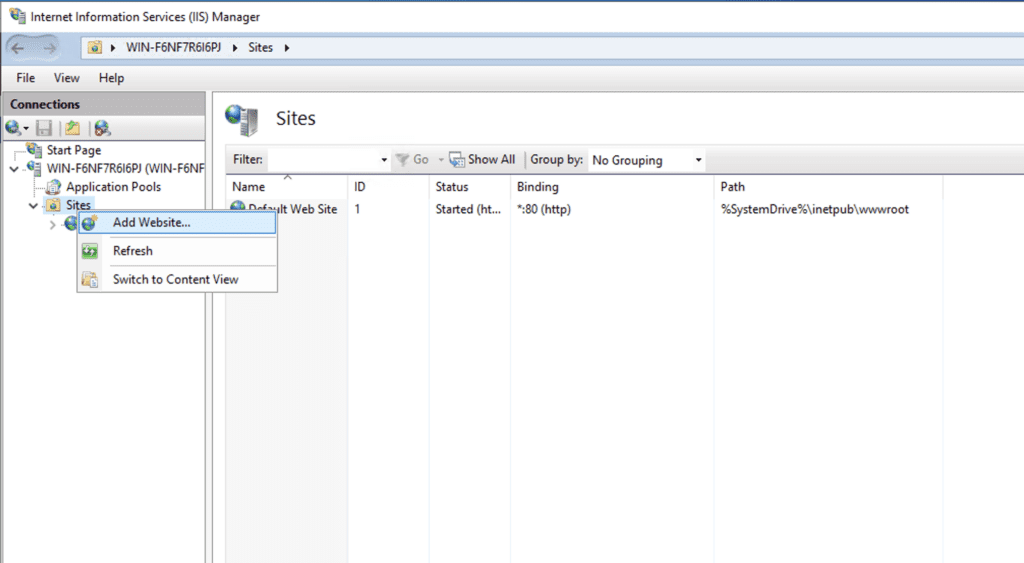
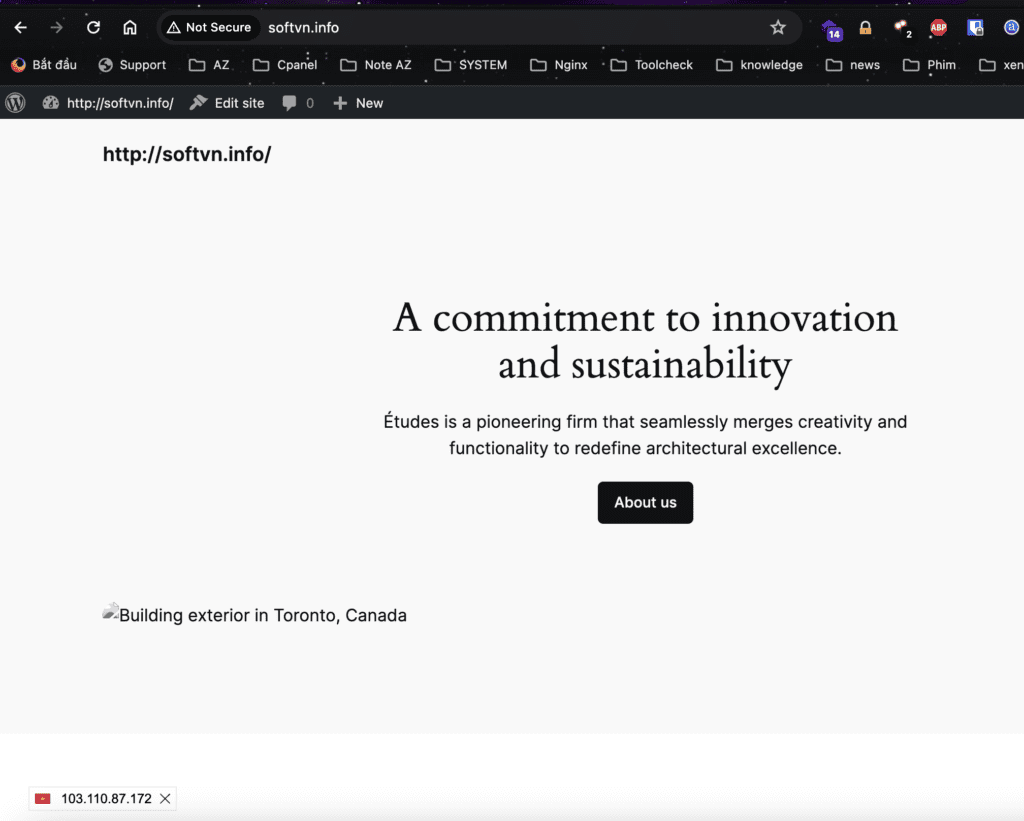
Chọn Add Website để thêm site mới vào. Và trong bài viết này tôi lựa chọn tên miền có tên softvn.info để làm ví dụ
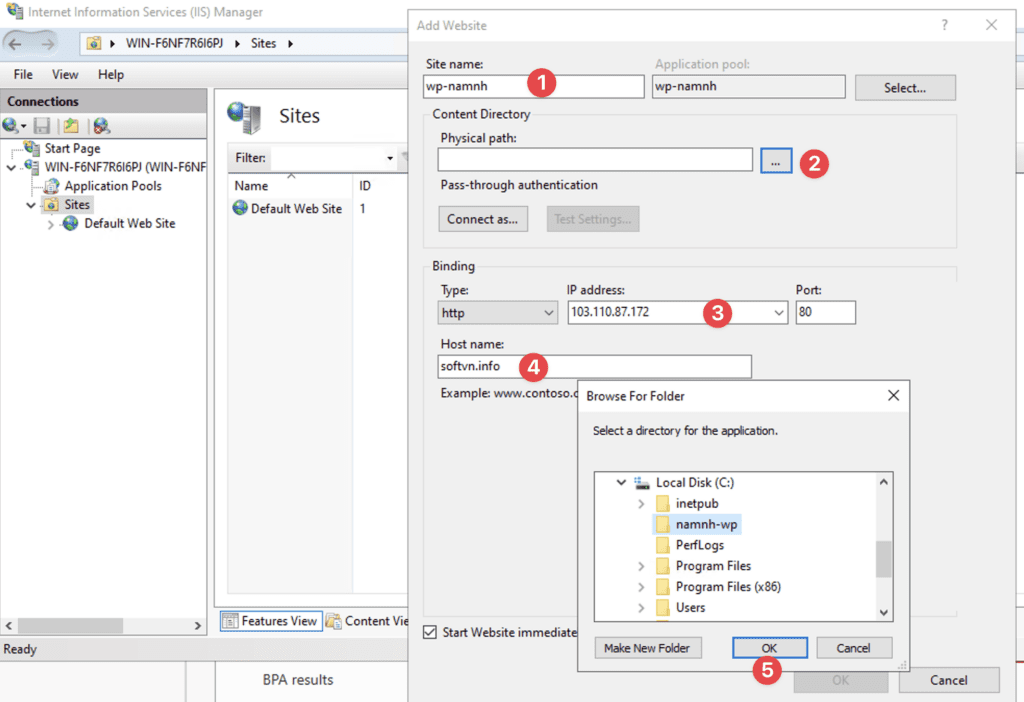
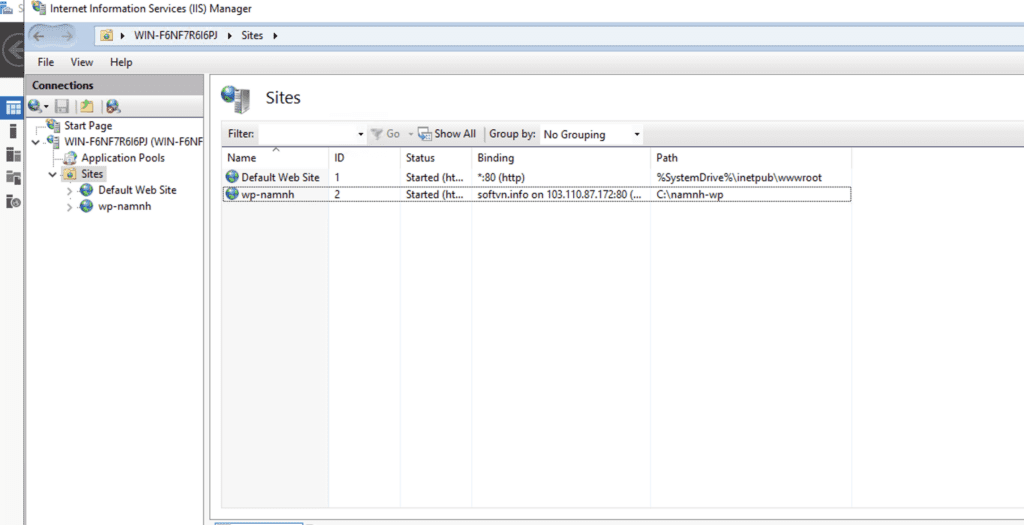
Chọn OK là đã hoàn tất tạo website
3. Tải Mã Nguồn WordPress
Để tải mã nguồn wordpress truy cập tại đây
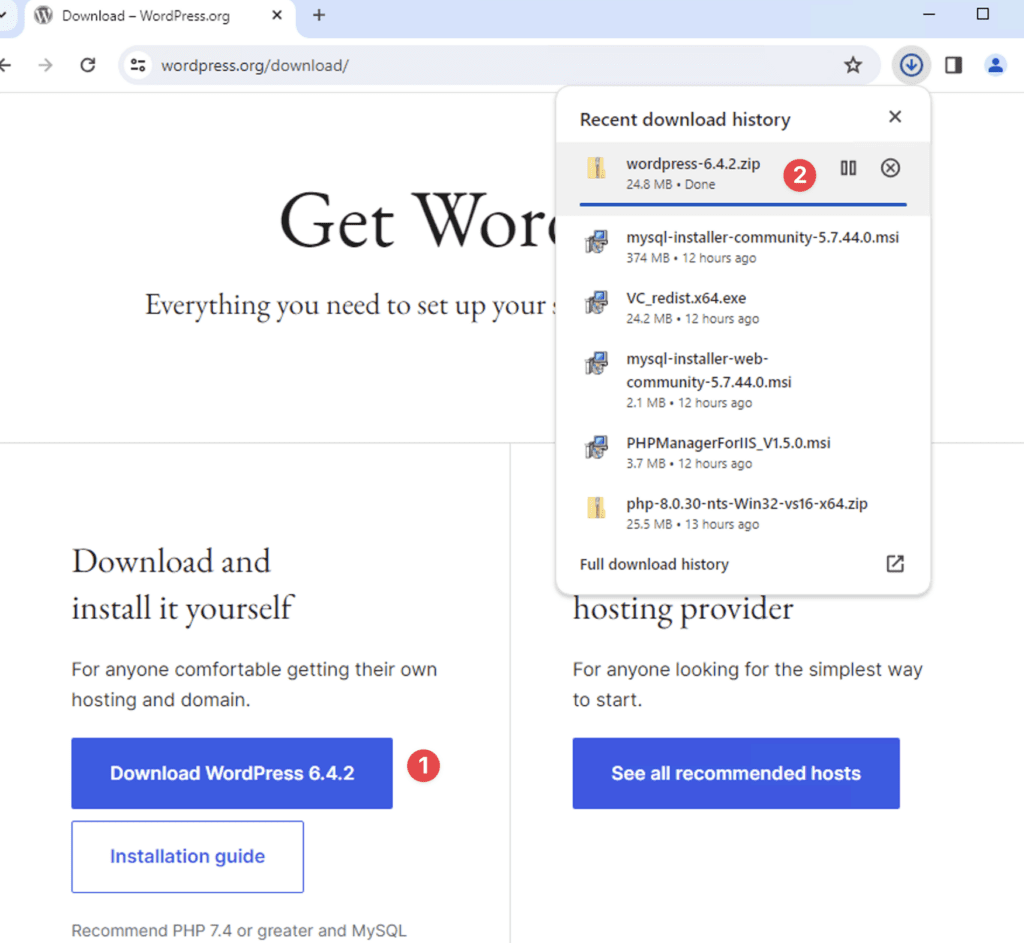
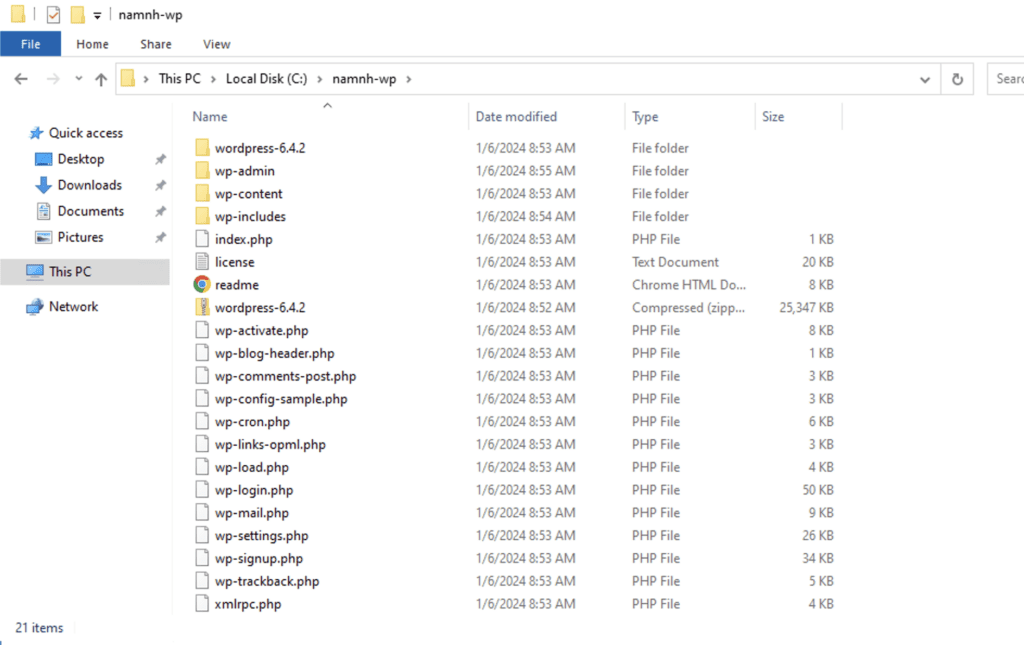
Tiến hành giải nén mã nguồn ngay thư mục namnh-wp. Bạn nhớ thay namnh-wp bằng tên của bạn
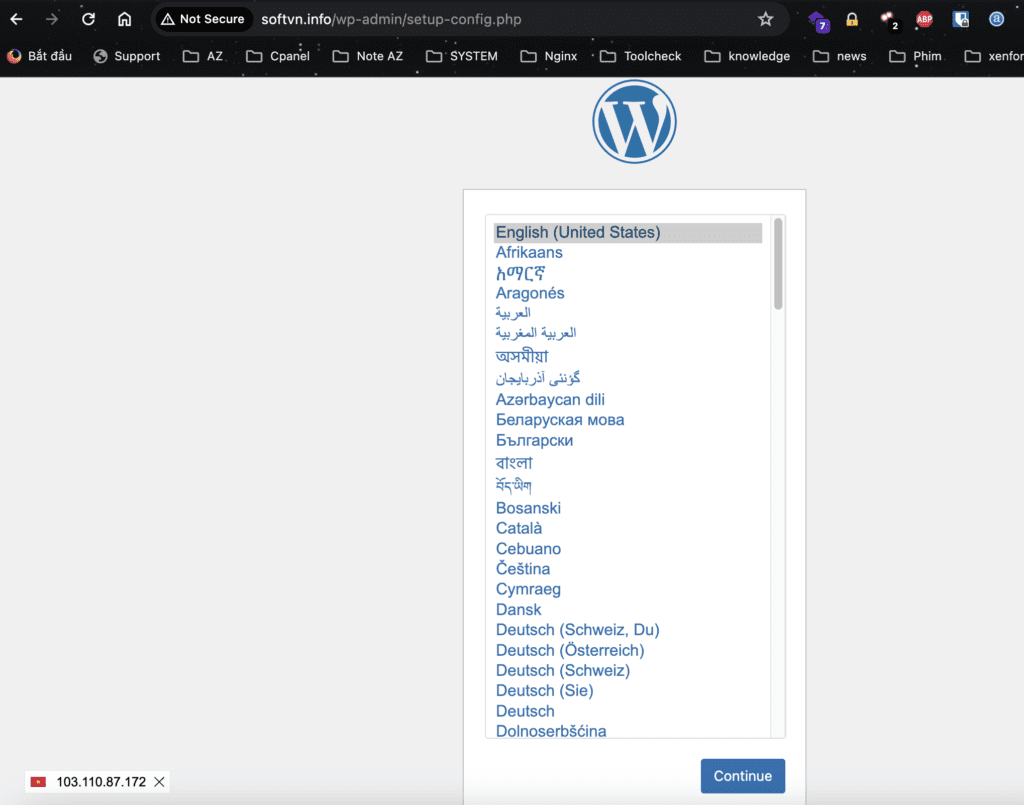
Tiến thành truy cập vào tên miền đã đặt để cài WordPress
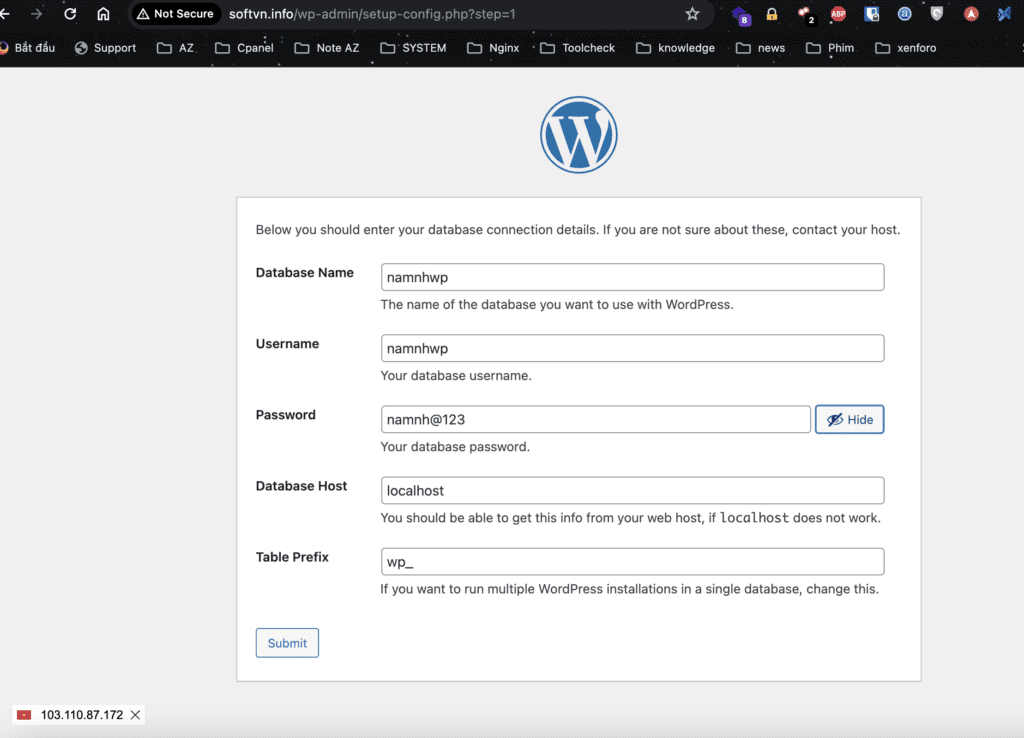
Nhập vào thông tin Database đã tạo ở trước trên vào.
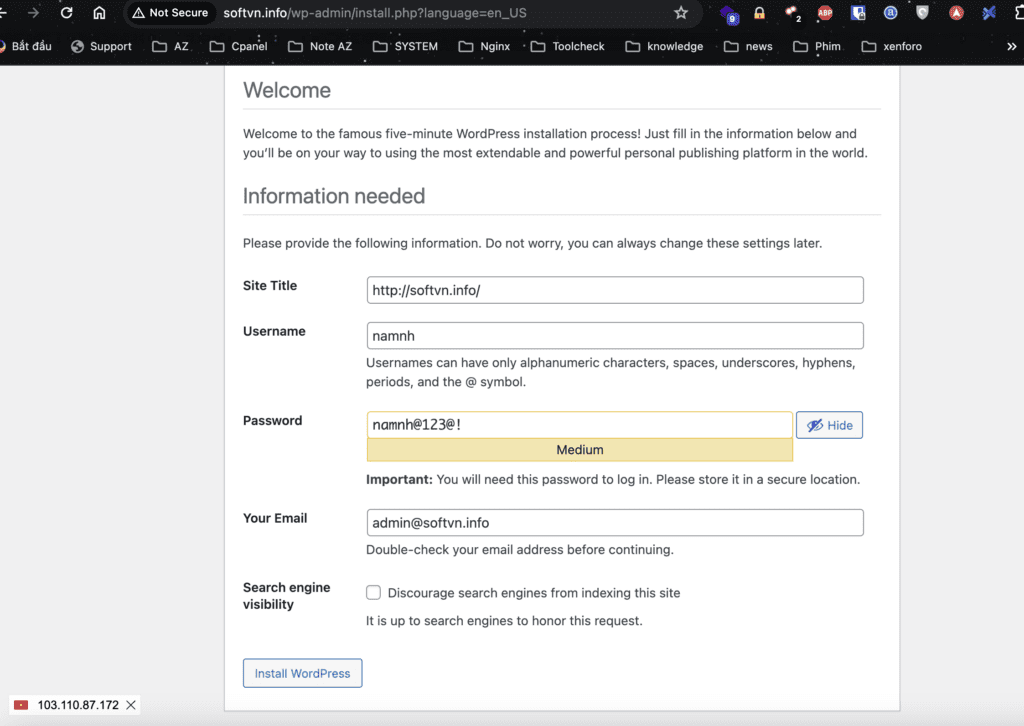
Chọn submit để cài đặt bước cuối cùng tạo user admin cho website.
Kiểm tra website đã truy cập thành công.
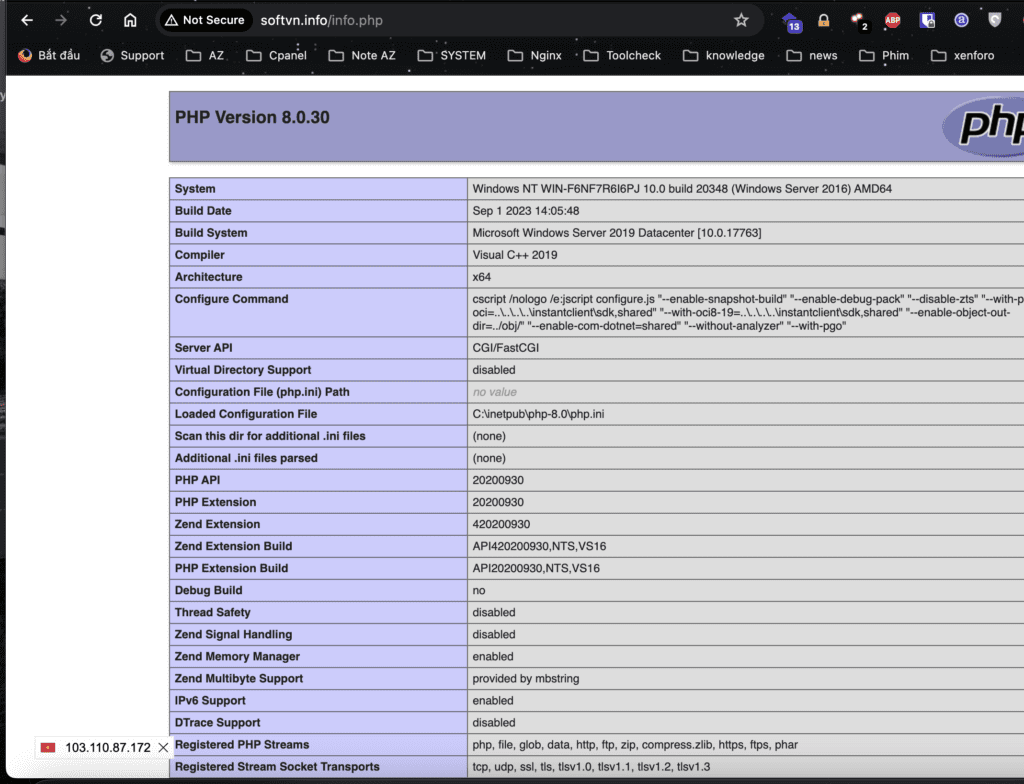
Tạo file info.php để kiểm tra phiên bản php đang sử dụng. (không bắt buộc)
<?php phpinfo();III. Cài đặt SSL Let’s Encrypt với IIS.
1. Tải file cài SSL Let’s Encrypt :
Các bạn truy cập vào trang: https://github.com/win-acme/win-acme/releases/latest để tải ACME mới nhất.
Sau đó tìm đến file win-acme.***.trimmed.zip .Đây sẽ là phầm mềm để cài đặt SSL Let’ Encrypt :

2. Cài đặt phần mềm SSL Let’s Encrypt :
Sau khi đã tải xong, các bạn giải nén file vửa tải được. Các bạn chọn chuột phải vào phần mềm wacs.exe, chọn Run as Administrator để khởi động ACME Simple wizard.

3. Tạo SSL Let’s Encrypt cho domain :
Sau khi đã khởi chạy ACME sẽ xuất hiện cửa sổ để nhập thông tin :

Chọn N để tạo tạo mới certificate và chọn domain cần cài đặt SSL :

Cuối cùng, các bạn đồng ý với các điều khoản dịch vụ và nhập thông tin email. Sau đó các bạn chờ chút để phần mềm cài đặt SSL :

Sau khi cài đặt xong, ACME sẽ tự động cấu hình SSL mà bạn vừa khởi tạo :

Thực hiện các bước như hướng dẫn trên thì các bạn đã cài đặt thành công SSL Let’s Encrypt với IIS.
(azdigi, paviet)